Yep, I also saw “Tron” back in 82…

… and man, was I spoiled!!!!! As a proof, take a look at the following image:

Dust cover & lights

Ok. This is my CNC after my last days with it. I had some MDF boards cut to make a dust and noise cover, with a transparent plastic front… and yes, it works! Noise and dust are reduced to the point of making the CNC usable at home… I needed some light also, and while foraging for parts I came across that nice leds strip, which seemed to me like a good addition to the looks of the machine, but most of all, as a great light source to see anything inside the case.

But I had to do something with the dust, still, cannot let it build up into the case. Here is my first simple approach: a handheld vacuum cleaner within the case (not visible in the photo). It worked for a while, but (i) the vacuum cleaner got clogged quite easily, and (ii) also got terribly hot. Next step will be drilling a hole in the case to get the vacuum tube out to an external (possibly homemade cyclone) extractor. I will also need to add some collecting device (brush, plastic strips…) to the tube holder to help direct the dust into the tube.

Dust collecting

Well, it really looks nice, doesn’t it… But still too slow for my needs… Maybe I should ask Santa for some new motors and leadscrews….

Where my CNC and this blog both come back to life…

I finally got around to refurbishing my CNC machine and set it to work for real! This is not the place to discuss the project I am working on, but let me say it is what the CNC machine was created for originally… and the machine seems to behave even better than expected.

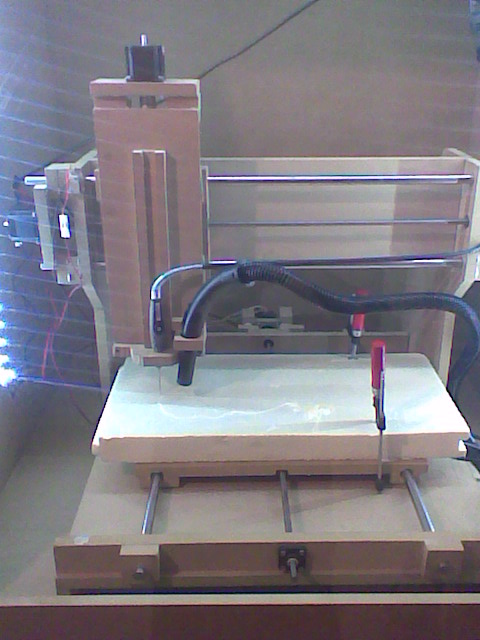
The modifications were mainly in order to increase speed. So first thing was to support the leadscrews as shown in this photo:

My CNC Refurbished and ready to work!

My CNC Refurbished and ready to work!

This allowed me to improve the speed by a small amount by reducing the leadscrew whipping, but it was not enough to make the machine useful for the big tasks ahead! So I asked at the official Rockcliff Forum and got the right answer: just power the motors with higher voltage, and so I did! This has taught me two lessons:

– I traded speed for precission: I got motors with too small a step and leadscrews with too small a pitch for my needs – I should have been more serious about my needs, I just jumped looking for precission while I did not need that much, and gave speed for granted! A coarser set-up (less steps per turn in the motor and a longer pitch in the screw) would have served my needs regarding accuracy and would have granted me much higher speed. At the moment, I have to stick to this set-up, since changing any of those elements would be too expensive. Too bad. Lesson 1: Think about REAL needs first!

– Now, the solution provided in the forum was great, but I should have been able to get there myself… Lesson 2: Try, and keep trying new things!

Now, a short video summarizing in less than 3 minutes the work of two days… still in testing phase but using the real model (driven by Mach 3 demo on Windows XP)…

Posted in cnc

CNC or I know what you did last summer…

Well, this is what I did… my CNC machine… It has a cutting area of A3 times 10 cm in depth. The only drawbacks are that it is very noisy, produces lots of dust and it is really sloooooow…. So I am in the process of upgrading it with a holding case to reduce noise and dust and with new threaded rods that are supported on both ends, not just at the motor end as they were.

To the video and some links in this post I add now some pictures:

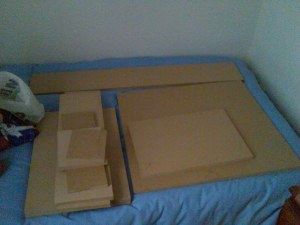
  • Raw materials
  • Imagen005

  • Basic frame built
  • Imagen002

  • Details of the motor / rod coupling
  • Imagen086

  • The finished monster
  • Imagen004

  • You can see the rod unsupported on the right, which I am extending now to the frame to hold it there with a bearing, so that I can reduce whipping and vibration, and hopefully increase speed
  • cnc-001

    Posted in cnc

    In which a new adventure begins, not knowing where it will take us or how long will the journey last…

    As stated in the  about post, I will be including info on different projects I have  been doing and hope to keep doing in the next months.

    First one I want to include is a DIY CNC machine built from plans purchased from Rockcliff… here I post two videos of the first cuts… The model is scaled up from the original plans, which has caused some problems: the threaded rods that drive the motion are not supported in one of their ends, and this makes the rods bend a vibrate too much, so at this moment the machine is torn to pieces to upgrade it with supported rods, which will hopefully allow me to increase both, stability and speed. I am also planning on builing some kind of isolaion enclosure to reduce dust and noise, which are a no-no when you don’t have a workshop and use an spare room in your downtown flat.

    First video, just trying out the machine…

    Second video, trying the 3D carving capabilities:

    Posted in cnc